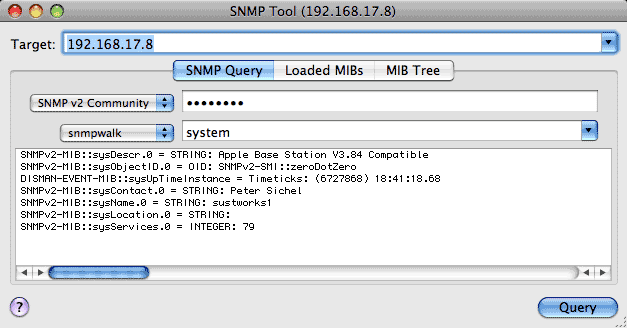

The SNMP Tool allows you to verify SNMP operation by retrieving information from SNMP enabled devices such as an AirPort Base Station. The tool performs an "snmpwalk" as shown and displays the response if any.
snmpwalk -v 1 -c public 192.168.17.8 system
While you can issue similar commands from a terminal, the tool makes it easier to verify SNMP settings by prompting you for the necessary information, remembering your parameters, and allowing you to browse the loaded MIB Tree.
In the AirPort example above, suppose you wanted to get more detailed information from your AirPort Base Station such as information about connected users or interface traffic statistics. The information available from an SNMP capable device is described in a structured file called a MIB (Managed Information Base). MIBs are used to convert symbolic names to numerical object identifiers (OIDs).
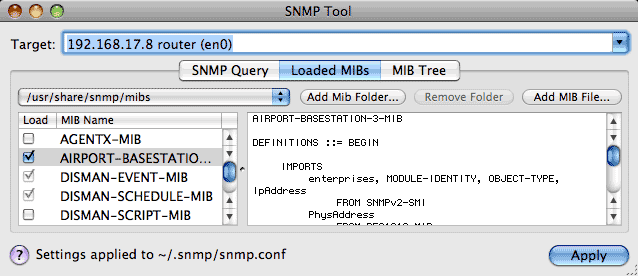
Clicking on the Loaded MIBs tab will show the list of MIB files currently installed and loaded on your system. The "Load" column indicates files that are currently loaded or will be loaded the next time you press Apply. Disabled or dimmed checkboxes indicate items that are loaded by default so cannot be edited. After you make changes, pressing Apply will cause the selected MIBs to be loaded explicitly in "~/.snmp/snmp.conf". If you select a different tabview before pressing Apply, any changes will be ignored since the table is refreshed to show the currently loaded MIBs each time the "Loaded MIBs" tab is selected.
The popup menu on the left shows the folder of MIB files you are currently viewing, while the buttons to the right allow you to add a folder containing additional MIB files, or add an individual MIB file.
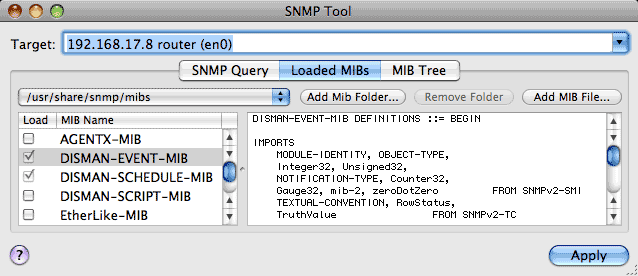
On recent versions of Mac OS X, the AirPort Base Station MIB should already be installed, but if it isn't for any reason, a quick Google search for "AirPort Base Station MIB" will turn up a link to the missing file. We can add this to the set of installed MIBs by clicking on "Add MIB File..."

A standard dialog appears allowing us to select the downloaded MIB file. The tool may ask for an administrator password if the directory containing MIB files is owned by the system, and then place the MIB in the corresponding directory with the correct name as read from the file.
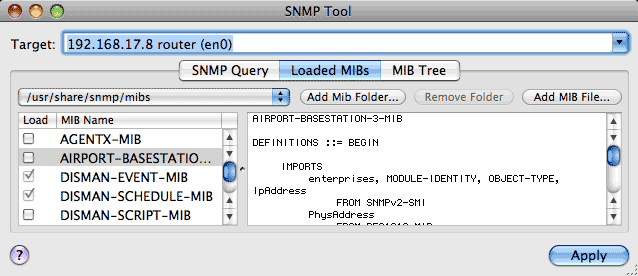
The MIB is now present, but has not yet been loaded by the Net-SNMP software. Attempting to walk the "airport" mib subtree will fail as follows:
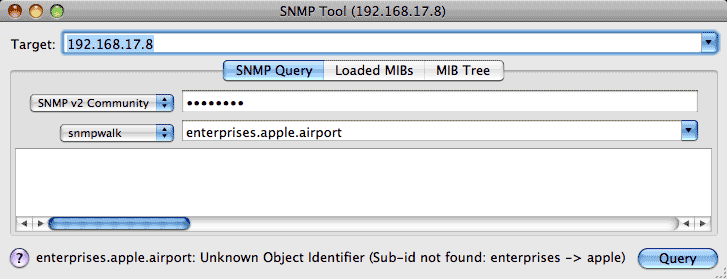
Returning to the Loaded MIBs tab, we can check the "Load" box and press Apply for the corresponding MIB.
This will allow us to walk the "airport" mib subtree.
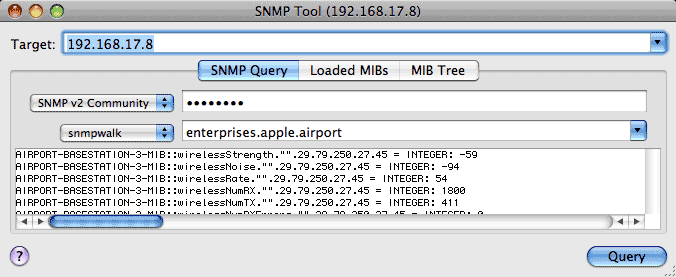
The result is similar to the following terminal command:
snmpwalk -m +AIRPORT-BASESTATION-3-MIB -Os -v 2c -c mypassword 192.168.17.8 enterprises.apple.airport
In this case however, the line "mib +AIRPORT-BASESTATION-3" has been added to ~/.snmp/smp.conf so you don't need to include it explicitly. Similarly, if you have a network laser printer or Cisco router, a quick Google search should turn up the corresponding MIB files for an SNMP capable device.
If you have a folder containing MIB files for one or more devices, you can add this folder to the list of directories searched by the Net-SNMP software by clicking "Add Mib Folder...". In this case, the folder path will be added to the MIB directory popup, and the line "mibdirs +<directory_path>" will be added to the ~/.snmp/smp.conf configuration file. If you wish to enable or disable all of the items in a MIB folder, you can Option-click on a single item.
By default, the Net-SNMP software will look for MIB files in /usr/share/snmp/mibs/ (system wide) and ~/.snmp/mibs/ (user specific), so these two folders are always included in the MIB directory popup. The "~" in the fle path refers to the users home directory. The user specific MIB folder is initially empty. Any settings you apply are written to ~/.snmp/snmp.conf, so are also user specific.
The MIB Tree allows you to browse the tree of MIB objects known to the Net-SNMP software. Following the example above, the AIRPORT-BASESTATION-3-MIB is now visible in the MIB tree.
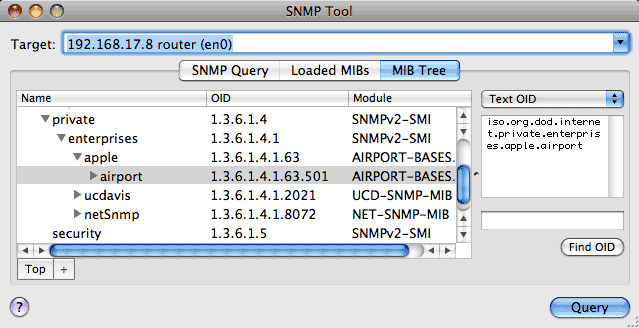
As you browse in the tree, double clicking on a row in the table or pressing the "+" button zooms-in to that branch of the tree. Pressing "Top" zooms back out to the top of the tree.
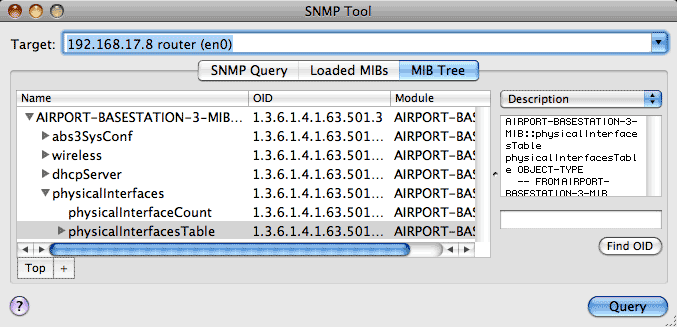
The text box on the right provides more information about the selected MIB entity (Text OID, Numeric OID, Module::name, or Description). Pressing "Query" will launch a request for the corresponding entity.
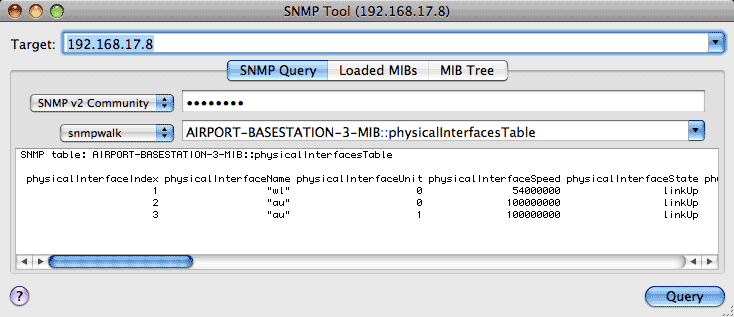
If the object name ends with "Table", the SNMP Tool will use the "snmptable" command to show the table in row format.
If you have an OID or name (such as .1.3.6.1.4.1.2021.9) you can have the SNMP Tool find it for you in the MIB Tree by pressing "Find OID" (lower right).

When you invoke one window from another, the corresponding data is automatically transferred.
A popup menu keeps a list of Recent Targets or history as well as common targets based on your network configuration. The contents of the target field are added to the list when a test to that target is invoked. If the recent targets menu becomes full (10 entries), the least recently used item will be removed. To add or remove an item, or clear the entire list, use the corresponding selections from the History menu.
You can open and use multiple SNMP Tool windows at the same time.
Thanks for trying out the SNMP Tool. Please send comments or suggestions to psichel "at" sustworks "dot" com. You can learn more about Net-SNMP here: <http://www.net-snmp.org/wiki/index.php/Tutorials>.
Enjoy!